You can use bamboo sticks to make garden hoops for netting. If the squirrels and pigeons get the garden berries before you, you might want to build a protective netting around the berries.
The bamboo garden hoops are perfect for protecting the berries in the garden.
Hope it gives you some ideas about how to build a simple, but practical, garden netting to stop deer, bird and insect netting from getting to you plants.
How to build a deer, bird and insect netting for garden
You will need x3 long bamboo sticks to go from one end of the netting to the other. This will set the length and width of the garden netting, so choose them carefully.
Alternatively, you can tie the bamboo together to give you a longer length.
Then, bend the bamboo stick into an arch shape, forming the bamboo garden hoops or loopers.
These will now be the hoops for the garden netting.
You can put the bamboo hoops straight into the soil or build an elevated top cover, and throw the net over it, like in this YouTube video.
This video shows how to build netting cheaply by using the materials listed in this article. All done in one day.
After completing the hoops for the garden netting, spread the net over the top and use ropes to tie them in.
No need to use nails or cable ties, garden ropes will do.
The idea is simple, but it works every time.
Here are some practical garden uses of bamboo sticks.
Bamboo best natural garden hoops
The bamboo sticks are fantastic materials for making garden hoops for netting, incredibly flexible. They can fit into the spaces making it easy to create formidable nettings for small gardens.
They are also best for arch-shaped netting.
You can use them to make almost anything from building netting like this to using them as support for runner beans, sweet peas or any garden plant.
Hope this article and the video guide give you an idea about how you can use bamboo to build garden hoops for your netting project, too.
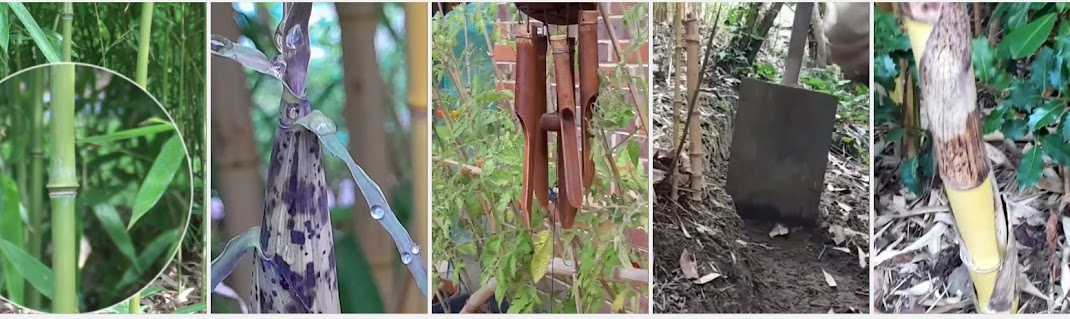
The freshly cut bamboo sticks from the bamboo grove are easy to bend to shape. In fact, they are so flexible that you can make a nice arch shape and use them as hoops for netting.
If you are using large bamboo stems, apply gentle heat to the stem and see the magic, the bamboo will bend easily.
Also, bamboo culms/stems will bend nicely from the bamboo grove. So, train them early on into a hoop while they are still young. For example, this big bamboo arch/hoop was trained into a hoop formed in the bamboo grove. Perfect for use in arching projects like this tomato frame.
These two bamboos grow well in the UK, their culms are slender, tall and very strong. They produce better, bendable, bamboo sticks which make great garden hoops for netting.
Other tall bamboos like the Phyllostachys vivax are also good, but they have large stems/culms, which are often hard to bend to shape.
Materials for bamboo garden netting
In this project, the main material is bamboo, others include old rubber hose and mesh wire. It is a simple idea, but it works out perfectly every time.
Firstly, use bamboo sticks/hoops to build the mainframe. Then, put the netting over it.
Materials:
Garden net
Mesh wire
Garden rope
Bamboo sticks
Point Crowbar
Old water hose
Note: Freshly cut bamboo sticks are best for making garden hoops for netting because they will bend easily without breaking.
You can substitute the materials for others you have in the garden, but the substitute for bamboo sticks can be hard to find.
List of materials, tools and garden essentials
Here is a list of tools, materials and garden essentials and where to buy them.
Hope it gives you some ideas about how to build a simple, but practical, garden netting to stop the deer, bird and insect netting from getting to you plants.
This article provides the steps for making a garden pallet planter box without using nails. You can re-use the materials you have in the garden for this project.
The steps are easy to follow. What's more, use the video guide to build your own.
DIY outdoor raised garden bed planter box
You can make a pallet planter box with some old pallet timbers, bamboo sticks and ropes.
I build these types of boxes and use them successfully in small spaces. Hope this instruction gives you an idea about your planter box project.
Materials for garden planter box
x12 pallet timbers or old weatherboards
x8 treated posts (or 4-inch by 2-inch timbers)
a packet of nails
Tools required
handsaw
hammer
shovel
road pin/crowbar
claw bar
DIY Outdor Planter Box project
The idea is to use bamboo sticks as pegs where the pallet timbers will slot in before tying them together. This will form the 4 sidewalls.
1. What you need: x24 bamboo sticks, x12 pallet timbers, ropes, and a crowbar.
2. Set dimension: The planter box is 1.5 metres by 1.5 metres all around, and the depth of the box is 0.4 metres.
3. Build the first sidewall: Use the crowbar to punch x6 holes in the soil (2 holes opposite each other); put x6 bamboo sticks into the holes.
4. Tie bamboo in pairs: Tie bamboo sticks/pegs in pairs with pallet timbers in between them– no need to use nails.
5. Build the other sides: use the same idea to build x4 sides.
6. Tie the corners: Each corner will now have 4 bamboos, use the ropes to tie all the 4 bamboos, at the corners, together.
7. Planting: Finally, add soil. Your planter is ready.
DIY ideas for small garden box planter - no nails
There are many ways to build raised planter boxes. It also depends on the materials and tools you have at home.
However, it is important to learn some simple techniques and best practices.
One of the best things that I’ve learnt over time is to use bamboo sticks in pairs as pegs to build the sides. Tie pair of bamboo sticks to hold the timbers together.
The natural plant leaves are perfect rope alternatives for projects like this. There is no need to use nails, cable ties, or other plastic ropes in the garden.
Cordyline australis leaves garden rope alternative
One of the plants that grow in the UK – the Cordyline plants – is the practical alternative for garden ropes and nylon ropes.
I’ve used the leaves to tie tomatoes, flowers, bamboo and many other plants in the garden.
Take a look at the different varieties of Cordyline australis available at Gardening Direct UK.
In this project, I used its dry leaves to tie the bamboo pegs that held the pallet timbers.
The leaves are strong ropes.
They can last for more than 24 months, similar to eco-garden tie-ropes. In fact, they are a great alternative for nails and other garden ropes.
The dry leaves from the Cordyline plants may not be ideal for permanent projects. Yet, they are perfect for tying plants in spring and temporary projects, like the DIY outdoor planter box. They can last the whole summer.
See this tomato plants hoop frame where I used strips of the Cordyline leaves as ropes as an alternative to nylon ropes.
If you want to use a natural (biodegradable) rope, use the Cordyline leaves. Here is where you can get the plants online in the UK.
Challenges of working with pallet timbers
Working with wooden pallet timbers is challenging because the jawed nails are hard to remove. Sometimes, you can damage the timbers.
To avoid that, Use the right tools to remove the nails and prepare the pallet timbers.
A wrecking bar with a chisel end is a perfect hand tool for removing nails without destroying the timbers.
I hope this article about DIY Outdoor Planter Box inspires you to build yours.
If you want moreideas for small gardens, check out my DIY bamboo garden projects.
In this article, you'll find out how to re-use pallet timbers and build large planter boxes for the garden, patio or any outside space.
The idea is simple, yet it works every time.
You’ll need pallet timbers to make a garden planter box like the one in the video.
Steps for making Large Planter Box
There are many ways to build large planter boxes. In some garden DIY projects, you may use the whole pallet, whereas others require removing the nails prior to using the timbers.
The best tool for removing nails from pallets without spoiling the timbers is a claw bar. (See the list of tools and material you'll need for this project at the end of this article.)
1. Collect the materials you’ll need for the project.
2. Set the dimensions (L, W & D).
3. Cut the corner posts and timbers to length.
4. Dig x4 holes big enough for two posts on each corner.
5. Build the 4 corners. Put two treated posts at the right angle to each other at each corner. Nail them together.
6. Build the sides of the planter box. Use a hammer to nail the pallet timbers to the corner posts. You can use 2, 3 or 4 pallet timbers – this will set the depth (D) of the planter box.
7. Fill the large planter box with garden soil or compost.
That’s it!
Your brand-new large planter box for the garden is ready.
Best technique for DIY Garden Planter Boxes
This is a little-known secret used in many planter boxes and DIY projects. It is called the ‘right-angled’ boxed technique.
The idea is about putting two timbers at a right-angle (90 degrees) to each other, where you can build the sidewalls of the box as shown in the image.
It is an effective technique for building strong boxes, raised beds, fences or any garden projects with corners.
Each corner with x2 posts at a right angle (90 degrees)
Make large planter boxes using a DIY technique
Using the right-angle technique is ideal for large planter boxes and raised beds. It makes the sides strong and stable. You can use the garden boxes for a long time.
We use the technique to build these two garden boxes.
In fact, we have been using the garden planter box on the right for over 6 years. And this year, we re-use the same pallet timbers to make the new planter box shown in the images above.
That's how long planter boxes like these last in the garden.
Small Planter Pox, elevated (L) and Raised Garden Box (R)
Firstly, build 4 stands for each corner. (Use 8 pallet timbers to make the stand for the corners by applying the right-angle technique mentioned earlier)
After that, hammer in the side timber, starting from the top. (Nail in 2, 3 or 4 pallet timbers on each side, leaving 5 – 10 cm space at the bottom.)
Then, complete the other sides.
Fill the Small Planter Box for the patio with soil.
That’s it!
Your new garden planter box for the patio is ready for planting.
Make Raised Garden Box for outside
You can use the same idea to build the raised garden box, which is much simpler than the elevated patio box because its bottom simply rests on the ground. And, requires less work.
You only have to build the x4 corners (using the right-angle technique) and the sides.
Working with wooden pallet timbers is challenging. It is difficult to remove the timbers from the jawed nails.
A wrecking claw bar with a chisel is a perfect hand tool for removing nails without destroying the timbers.
Simple garden DIY ideas that work
In many cases, you do not have to spend money to build new garden boxes and raised beds. You can re-use what you have to create something that you want.
Learning to use gardening techniques like these can help you build strong planter boxes and raised garden beds. They can be adapted to other wooden garden projects too.
We shared two skills that DIY gardeners will find useful: the Right-angled technique and bamboo pegging. We’ve used it in many projects.
They are simple ideas but work every time.
Get more ideas about the Home and Garden DIY projects via the links.
Clumping bamboos do not have running rhizomes, instead, the roots are packed around the base forming a clumped base, hence the name clump-forming bamboo.
When separating the clumps, take care to preserve the parent plant.
Before starting to remove bamboo plants, make sure that the area is nice and clean - clear of any hazards.
The steps will help you to get started.
Use Pairs of secateurs or garden loppers
1: Use a pair of secateurs or garden loppers to cut down the stems, remove the branches and store the bamboo canes for future use.
2: Cut all the rhizomes and pull them out.
Then, cut them into small pieces and store them in a dry place until they dry out. Do not discard them straight away because if you do, they will grow back.
Also, pour hot water or vinegar over the newly cut rhizome to kill them permanently.
Use a pickaxe as a lever
3: The rhizomes grow on the top layer of the soil, so dig down and along or around the bamboo plant.
Use the pickaxe as a lever to uproot the rhizomes. If it is too strong, cut the rhizomes into sections as it will be easy to remove.
Use a spade to remove soil
4: Remove any soil around the bamboo roots and base of the parent plant.
Keep the cutting in direct sun or pour boiling water on them to stop the cutting from growing again.
If you want to remove bamboo permanently, you must remove all rhizomes, including the cuttings and discard them away from your property.
4 Best ways to kill bamboos plants permanently
Although bamboo plants are evergreen and adorable plants adorable, the rate at which they grow can be troublesome.
The running bamboo plants spread aggressively and take up any space very quickly if left unchecked for 2 – 3 years.
One of these methods may be ideal for you when removing bamboo plants, check the links for details:
Note: Get it done professionally. The work is painstakingly hard.
If you want to do it yourself, here are 4 ways to kill bamboo plants permanently.
Understanding and working with bamboos
If you want to know the methods for killing bamboo fast, skip this part and read the method that you wish to use in the article.
In fact, understanding the features of the bamboos’ roots, rhizomes and stems can reduce the effort required to kill the bamboos.
The bamboos are put into two groups: Running bamboos and Clump-forming bamboos. (We covered this in detail here – Bamboo Varieties that Thrive in the UK).
In the open, the running rhizomes may grow to an average depth of 30 - 40cm.
Although this depth is quite shallow, the intricate rooting system makes it difficult to kill bamboo permanently.
Also, the clump-forming bamboo could be quite tough to remove. The clumpers' bases are much tougher because of the compact nature of this bamboo.
Therefore, you may have to apply one or more ways of killing the bamboo highlighted in this article to remove them permanently.
1: Cut the stems and rhizomes close to the ground. Collect the bamboo stick for use in the garden.
2: Dig up the bamboo, and loosen the soil around the roots and rhizomes.
3: Leave the cuttings and leaves for a few days to dry.
4: Put enough bamboo cuttings into the fire pit or the enclosed fireplace. Add more until you’ve burnt all the cuttings. Do not burn all of them at the same time.
You can use bamboo ash in the garden. The silica content in bamboo is high in calcium and potassium.
Warning: Use a closed fire pit or makeshift fireplace to contain the heat and flames.
Do not burn bamboo in the open, near buildings, in busy residential areas or anywhere that is not safe to make a fire.
The burning leaves and hollow hardy stems can release lots of heat and flames capable of reaching several metres.
Best ways to kill bamboos plants permanently
Although bamboo plants are evergreen and adorable plants adorable, the rate at which they grow can be troublesome.
They spread aggressively and take up any space that is available very quickly if left untouched for 2 – 3 years.
Bamboo seeds take up to 12 months to grow in propagators before they can be transplanted into holding pots.
Care has to be taken when transplanting delicate new plants.
Steps for transplanting new bamboo plants
When the seeds have germinated, it is time to transplant them into the garden or larger pots.
You will need steady hands to do that.
Step 1. Prepare soil for growing bamboo sprouts:
Mix a good potting soil with compost bark in the ratio of 75% to 25%, or 3 parts potting mixture to 1 part compost bark. The compost bark will add humus to the soil.
Alternatively, use natural plant-based humus such as fine grass cuttings. Do not add too much as the heat can kill the new bamboo seedlings.
Step 2. Moving sprouts:
Carefully pull the healthy sprouting seeds out of the propagating pot or tray.
Use a lifter so that you do not break the delicate roots.
Step 3. Leave the soil in the propagator
Put the propagating pots or trays back and leave for a further 10 days as the dormant bamboo seeds are likely to germinate.
Step 4. Potting sprouts:
Lay the bottom of the 4cm or 6cm plastics pots or containers with pebbles or broken ceramics. This will stop soil from falling through and improve drainage.
Add the mixture of potting soil and bark (from Step 1). Plant the sprouts in the centre of the pots, careful not to damage the taproot and new root hairs.
Step 5. Site for potted sprouts:
Set the potted sprouts (in Step 4) in a location where the condition is suitable for further growth. Ideally in a greenhouse or indoors, for the new bamboo to grow for 10 - 12 months.
NOTE: You could lose 1 in 10 bamboo seedlings, but most of them stand a chance to germinate.
When the new bamboos have reached a height of 10 – 40cm, it is time to move them into larger pots and containers.
Transplant them into mini grow pots. Always use plastic pots. The ceramic pots retain heat and are not ideal for germinating seeds.
They’ll need water even in Winter and a lot of attention.
Though bamboo seeds carry the nutrients they need to germinate, once they are transplanted, they'll need nourishment. So, use nutrient-rich soil.
The best soil for planting new bamboo plants is an all-purpose compose.
Spring is the best time to transplant new bamboo that you grow from seeds.
Bamboos are fastest-growing plants
Bamboo plants are known as the fastest-growing plants. Some species can grow at an average of 1m per day.
The first shoots, rhizomes and culms can reach their full growth between the 4th or 5th year after planting. When the bamboos start to ‘outgrow’ the pots, repot them.
Prune the rhizomes and old culms so that they do not invade other spaces
The best thing to do when learning how to propagate bamboo from seeds and transplant them successfully is to prepare the materials and site properly.
There are three common ways to propagate bamboo plants – using the seeds, rhizome cuttings and culm cuttings. Find out how to plant bamboo seeds and transplant them successfully.
Materials for planting bamboo seeds
The two important factors you should pay attention to when propagating bamboo seeds are temperature and soil moisture.
As a rule of thumb, temperatures between 25 and 30 degrees Celsius and high moisture content are ideal for bamboo seeds to germinate.
A 50/50 organic compost.
4cm - 6cm growing pots or trays.
Bowls for soaking the seeds.
Rainwater or distilled water.
Propagator (or well-insulated greenhouse) to keep the temperature constant at 25 – 30 degrees Celsius
Buy bamboo seeds online
Bamboo plants flower occasionally and therefore seeds are hard to find. Yet, you can buy the seeds either online or from reputable nurseries in the UK.
We found three online sellers that are based in the UK and do free deliveries. Here is their link on Amazon.
Plant bamboo seeds indoor
Important: To grow bamboo from seed, soak the seeds in a bowl of water for about 24 hours to promote root development. Distilled water is ideal for soaking bamboo seeds. Avoid using treated water.
Keep the temperatures at the standard room temperature to promote germination.
Step 1 Soak seeds:
Firstly, soak the bamboo seed in a bowl of water for 20 - 24 hours. The water should not be too hot or too cold.
Hot temperatures will destroy the bamboo seeds. Cooler temperatures are likely to delay the seeds from germinating, 22 – 25 degrees Celsius are ideal for soaking bamboo seeds.
Step 2 Prepare compost and potting seeds:
Prepare the compost in a pot or tray, space the seeds out at 1 - 2cm intervals and sprinkle a fine layer of compost on the top.
Step 3 Control temperature and moisture:
Use a seed propagator if you have one. Alternatively, use a clear plastic bag big enough to cover the pot.
Seeds germinate well where it is not too hot or too cool. Maintain the germinating temperature of 22 – 26 degrees Celsius.
Step 4Potted seeds storage site:
Place your newly potted seeds where there is a medium shade, away from direct sunlight. Check the potted seeds daily.
You should see the first sign of sprouting after 10 – 15 days.
Step 5 Seeds care:
It can take up to 30 days for all the seeds to germinate, and some seeds may take longer. Check that the leaves are green and healthy, and the soil remains moist.
Elevate the clear plastic cover, of the lid if you are using a propagator so that the leaves do not touch the sides of the covers.
Put the seeds indoors or greenhouse and maintain the soil moisture content as well as the temperature so that it is not too cold or too hot but at the standard room temperature of 22 – 25 degrees Celsius.
After they’ve germinated, it is time to transplant them into mini grow pots.
Always use plastic pots. The ceramic pots retain heat and are not ideal for germinating seeds.
From seeds to germinating and transplanting bamboo plants, they’ll need water even in Winter. They’ll also need mulch and a lot of attention.
Bamboo seeds carry the nutrients they need to germinate. Yet, grow them in well-drained, nutrient-rich soil.
The best soil for growing bamboo seeds is an all-purpose compose.
How long does it take bamboo seeds to grow?
New shoots and roots will appear after 20-30 days after planting.
This is the best part of growing bamboo from seeds, it shows that the bamboo roots and rhizomes, and culms are establishing themselves in the propagator.
Start potting the early bamboo sprouts into larger pots where they'll grow for the next 12 months.
This will give the seeds that remained dormant in the propagator a chance to germinate.
Note: It can take as long as 5 years to grow bamboo from seeds to planting in pots and in the garden.
Newly planted bamboo in well-drained, moist soil will thrive when they've established a strong root system. this will be obvious from the healthy culms (stems), branches and leaves.
This video provides insight into how a new bamboo grows in the soil.
Plant new bamboo in soil
This archive of articles has lots of info about how to propagate new bamboo plants, check it out.
The articles are insightful (and personal) take on how to propagate, transplant and grow bamboo plants successfully.
You can see most of out work on our YouTube channel too.
We hope this article inspires you to grow your own bamboo plant in the garden and enjoy the beauty of this amazing plant.